Wednesday, December 28, 2011

Massive Makeup and Life Haul

Wish I could have posted more during the past few months, but with school full-time and working 30 hours a week minimum, it gets hard to upkeep on here.  I'm not very good at explaining and showing things through just writing so I'm going to post a bunch of pictures and write the review/update underneath each picture :)

Firstly, this is what I look like without makeup...ha...ha.  I just got through taking Stage Makeup I at my college.  Although I am an Art major and this class is for theater folk, I really wanted to take it for one of my electives because I'm completely enthralled with makeup of all kinds.  This particular image is the Old Age project, probably one of my favorites to do!!  I wish I could do it once a week and wear it out, but that's a little weird.


For this project, we had to find a character from a book or a play with an interesting nose and eyebrow combo and with the help of my boyfriend, I chose Ebenezer Scrooge.  Mind you this is my first try at anything of this sort.  We had to do eyebrow blocking and draw on completely new brows as well as use nose/scar putty to create a new nose.  If I had more time, I would go back and add more wrinkles to the makeup, but I'm happy with how it turned out.

This is my practice for animal makeup.  I chose a cat that lives in the animal shelter I volunteer at.  Below is the final look I did in class.

I had to do eyebrow blocking for this one and the makeup used throughout my course was from the Ben Nye Creme Makeup Kit.  This was soooo much fun for me. 


My other favorite has to be this project where had to choose a celebrity to transform ourselves into with the use of makeup.  I chose Megan Fox because, well, I like her despite the zillions that don't.  I used eyebrow blocking again and drew on the high arches.  This looked awesome in person, but iPhone plus flourescent lighting is just awful.


So this is an awkward picture because I was leaning back, but I really like how my makeup turned out.  The eyeshadow is all from my previously reviewed Victoria's Secret Metallic Eye Palette.  Liner is the wet n wild Creme Liner in black and lip is Rimmel's Infinite Color in Eternal Flame.  It seriously lasted all night on me and everytime I went to the bathroom to put more on, I never needed to!  And why complain that it wont come off later??  You buy products like these for that reason.  Lotion, washcloth, water, it'll come off.  I'm also wearing Estee Lauder Double Wear in Ecru, but can't remember the bronzer and blush at all :(

Duhh Yep Yep. 
I recently purchased Tarte's holiday palette Puttin' On The Glitz at Ulta when they had their 20% off everything sale.  Shadow, blush, highlight, bronzer and lip gloss are all from that set which I would like to do a review on soon.

Wearing Victoria's Secret's new palette in Masquerade exclusively on my eyes besides the liner and mascara.
Foundation: Estee Lauder Double Wear Light 01
Concealer: MAC Studio Sculpt NW15
Blush: Sally Hansen Natural Beauty Inspired by Carmindy powder blush in Poppy
Highlighter: MAC Soft and Gentle
Eyeliner: Physician's Formula Shimmerstrips custome eyeliner for green eyes (Black pot)
Mascara: Maybelline Collosal in Black
Bronzer: L'Oreal Project Runway Blush in Audacious Amazon (I liked it better as a bronzer)
Lip: Victoria's Secret lipgloss in Blush


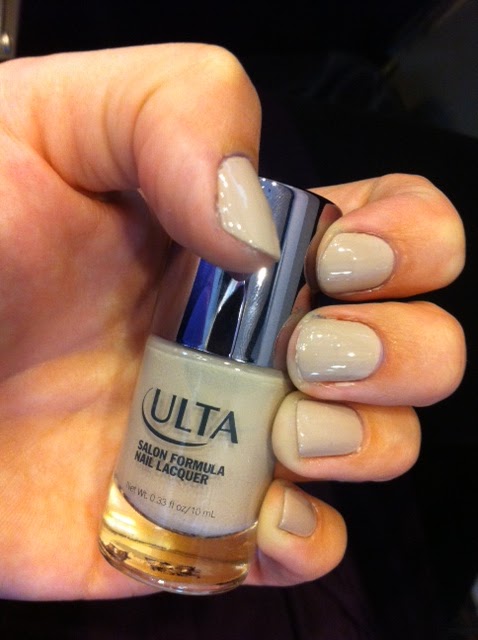
Decided to pick this up at CVS for $1.99.  It also came with a fast dry top coat.  That's the main reason I bought it and I really love anything that is vibrant violent.  This is definitely more purple in person, but eyecatching nonetheless.  "Good consistency" too (haha Cartman).

LIFE PORTION:

We had to put my dog Jenny down on September 26th.  She was two months shy of turning 17.  I miss her every day, but she's certainly in a better place and that makes me happy <3


These guys are my brother and his wife's French Bulldogs, Coco and Jake.  They are soooo cute, I can't stand it.

Here's Jake on Halloween dressed up as a cop.  Hehehe.  He looks just like Stitch from "Lelo & Stitch" if anyone remembers that movie.


Lookie who I come home to every day.  Happy melts my heart or makes me crack up just by looking at her.

OUT AND ABOUT PICS:


Kathy and I at The Mid (Chicago).

Kathy, Patty, and I at Belvedeere for Kathy's B-day.  I used the Conair YouCurl to achieve the hair in case anyone was wondering.


Spy Bar


SO that wraps up this post.  I have a lot more to review!!  It's so overwhelming.  I have an Iwata airbrush system to review too.  EEK!!

Wednesday, September 7, 2011

2012 Cherimoya Cracked Nail Polish

I don't know where this stuff came from, but it's amazing and definitely compareable to the Shatter collection.  They have several and I mean like 30 to 40 different shades.  I found mine at Walgreens for $2.99!  How inexpensive is that?!  Cheapness excites me.


I got a vibrant violet shade #13.  Applying it is semi-tricky though.  If you lay it on thick, it will not crackle, but that is also what makes it great because a thinner layer will give a great amount of crackle that is also opaque against your base nail color.  I don't know if this goes for all of the shades, but I'm assuming the solid colors will act alike.

I'm wearing Sally Hansen Hard As Nails in Heart of Stone underneath the crackle.


I really think anyone should try these and you can't lose much at $2.99.  If you really don't like it, Walgreens has a lenient return policy.

Thursday, September 1, 2011

wet n wild Comfort Zone Palette Review

So yes, I have seen this out for a while, but I already had so many of the wet n wild palettes that I didn't want to buy another one right away.  But I spotted the light shimmery taupe shade in the upper right hand corner and I was like for 5 dollars I'll buy it.  I love that shade so much. 

 
No Flash
Flash
 This whole palette is extremely pigmented.  I can't believe wet n wild's quality for the price.  The day I bought the palette I was at the Estee Lauder counter earlier in the day buying foundation and was testing out their eyeshadows which are so so and disappointing.  Then I buy this, take it home, and open it to find that the shadow quality is superior to what I was just testing (sorry EL). 

None of these shadows are dusty or chalky, they felt a little like UD shadows to me.  Here are the swatches:

With UDPP, Left/Flash, Right/No Flash:


No Primer, Left/Flash, Right/No Flash:


As you can see, not a huge difference at all between the primer swatches and without.  I did a look with this and I wish I took a picture because it looked very mesmerizing.  I'll have to attempt it again and post it.

In the mean time....

This is an outfit I created at Macy's with clearance items, I didn't buy the cherry jacket because I know I'd only wear it once.  I loved the combo I chose, so I had to take a picture.  I love cheap and cute finds.
I want these grandpa shoes from the Material Girl line at Macy's!!!!
Urban Decay sale order.  One of my shadows was missing from the order and they neglected to tell me that it was out of stock.  3 emails and 2 weeks later, I was sent a polite email telling me I'd get my money back.  But I'm sad because that was what I was most looking forward to using. I have the WORST luck with online orders.
Love Aaron from Ghostland Observatory.  These guys are amazing performers.
Look at their laser light show!! Incredibly magical.


Tuesday, August 30, 2011

Leopard Nails

I made an attempt at the look after wanting the Sally Hansen ones that you just stick on, but couldn't justify spending ten dollars on a package.  So with nail polishes I already had, I made my own leopard nails.  Here's how:

1. Painted my nails with Ulta's Set the Nude Nail Lacquer.  No top coat.

2. Make small irregular circles/dots with black nail polish tool.  I used Milani's black polish that's specifically made for nail designs.  You can get it at CVS.

3. After that dried a little bit, I went back and added white dots in the circles for some dimension.  I used a similar polish to the Milani one that I bought from Icing.

4.  Let everything dry.  Otherwise you will smear the polish which I did.  It doesn't necessarily look terrible because it almost adds a fuzzy/furry effect, but it's an unreliable technique to attempt each time.

5. Then top coat to seal the design in.

Friday, August 19, 2011

Ulta Nail Lacquer in Set The Nude Review

I had some reward points that were up to Level 3 so I decided to use that to get a free nail polish and eyeshadow.  Set the Nude is a beigey taupe color that is matte.  I just tried it today and so far I love it.  It only took one semi-thick coat to cover the nail completely.  I'm impressed.  I have use Ulta nail polishes in the past, but I think that they have changed their formula because the quality of this polish is much better than the last.  Usually it's not hard for me to make a little mess on my fingers while painting my nails and with this brush and formula there was none of that.  I hardly got a drop on my skin, that almost never happens.  Overall, I would give Set the Nude 10/10 unless it chips in the next 24 hrs.
Pardon my unmanicured nails.  I had just taken navy blue polish off.
LIFE:
This is my Jenny.  16 yrs old, hang in there.

My BF and I saw Crystal Castles at the House of Blues and it was an imtimate and perfect show.  I've seen them before and I think this was one of their best performances.  Very happy that I got to be there.  Thanks to Dave and his friend Alex.
This is Lollapalooza during the day.
And Lolla at night.  It was so much fun.  I can't wait until next year!!!!
Got to meet Ben Lyons at Lollapalooza.
And Aaron Paul from Breaking Bad.  BB is THE best show I've seen in my life (filming, acting, plot, everything is well done).

Monday, July 18, 2011

How to Avoid New Blemishes from Picking/Squeezing

I know it's nasty!  But sometimes some of us have a tendency to pick at or squeeze blemishes and blackheads in hopes that they go away.  It's a terrbile habit (more like a stress induced habit for me) and should NEVER occur if you wish to keep your skin clear and undamaged.  As a result of picking, new blemishes tend to pop up and old ones tend to get worse. 

But anyway, when I decide to do this, here is what I do to avoid worsening my skin's condition:

*I don't recommend that anyone do this if their skin is really sensitive (mine is semi-sensitive) or if it just sounds like a bad idea to you.

1.  After I've taken the plunge, I gently wash my face with a cleanser like Purpose.

2. After gentle cleansing to clear away dirt, I take a face brush (I use the Face Secrets one from Sally Beauty) and scrub in a circular motion all over my face (avoid delicate eye tissues).  I push a little harder on the brush than I normally would for daily use.  Use a cleanser of your choice.  I either use the same gentle cleanser or sometimes use the Equate version of Proactiv found at Walmart cleanser.


3.  Then I pat my skin dry with a clean towel.

4.  Next I take the Equate version of Proactiv's third step lotion with benzoyl peroxide and rub it all over my face (not in globs, be reasonable, there shouldn't be excess product on your face).  Spot treating doesn't seem to stop the spread of blemishes to the rest of the face.


5. Avoid touching your face from then on, go to sleep!  Let the product work.

*If you have Proactiv, go ahead and use that because the ingredients are pretty much the same.  I've used Proactiv in the past and the Equate system smells, feels, and works just the same.

Again, I'm no expert, this is just what I found works for me after having this bad habit for years.  Almost seems like a miracle that I wake up looking like I've hardly done a damn thing to my face.  And I don't know why magazines tell you to hold ice to a inflamed blemish, because I still do this hoping it helps, but it really doesn't make a difference at all and ends up leaving my skin red in spots where I held the ice (yes, it was wrapped in a towel and not directly applied ice to skin).  My skin also feels more sensitive after icing.  But if it works for you, great.

And my dawgie.  Can't get enough of her.

Friday, July 8, 2011

FOTD: Sexy Neutral? and ecoTools Bronzer Brush Review

Haha I don't know what to call this look, but I did it before work yesterday and I love it.  I felt pretty all day and my makeup only started to fade if even after 8 hours.  Sorry my pictures are taken with my phone so they aren't the highest of quality but you can still see what I used.

Eye Primer: LORAC Behind the Scenes Eye Primer
Eyeshadow: LORAC Box Office Hit palette 
Eyeliner (Top): wet n wild Mega Liner Liquid Eyeliner in Dark Brown
Eyeliner (Waterline): Cover Girl Liquiline Blast in Green Glow
Mascara: Maybelline Colossal Mascara in Black
Foundation: Revlon Colorstay for Normal/Dry Skin in Sand Beige
Powder: MAC Mineralize Skinfinish in Medium
Concealer: Physician's Formula Conceal Rx in Natural Light
Blush/Bronzer: Neutrogena Healthy Skin Custom Glow Blush & Bronzer in Posie Glow
Highlighter: Jane. Shimmering Blush in Wisteria
Lip: Revlon Super Lustrous Lipgloss in Peach Petal
 
Tid bit: Jane's shimmering blush was used only on the highest part of my cheekbone and along the slope of my nose.

Tid bit: To line my bottom lash line I used the navy shade from the LORAC palette.
And although the Green Glow eyeliner is very light and not as dramatic as I paid/hoped for it to be, it's a very pretty accent to the whole eye look.

Love this brush! The ecoTools Bronzer Brush is very dense and applies MAC MSF like a dream.  It also doesn't leave a lot of extra dust or whatever you want to call it when swipe the brush across the powder.  The handle is thicker and makes holding the brush during application much easier.  I just don't like the bamboo look of the ecoTools line.

EXTRAS OF MY LIFE:

My old puppy:

Detroit Electronic Music Festival
Eek, I got to meet Skrillex!

Dress/Shirt that I made all freehand :) First time too. I did watch a tutorial for sewing on the sleeves though.  I forgot her name, but it was really helpful.  It looks skanky in this picture because of the lighting, but it's not.  I would also wear it with tights.